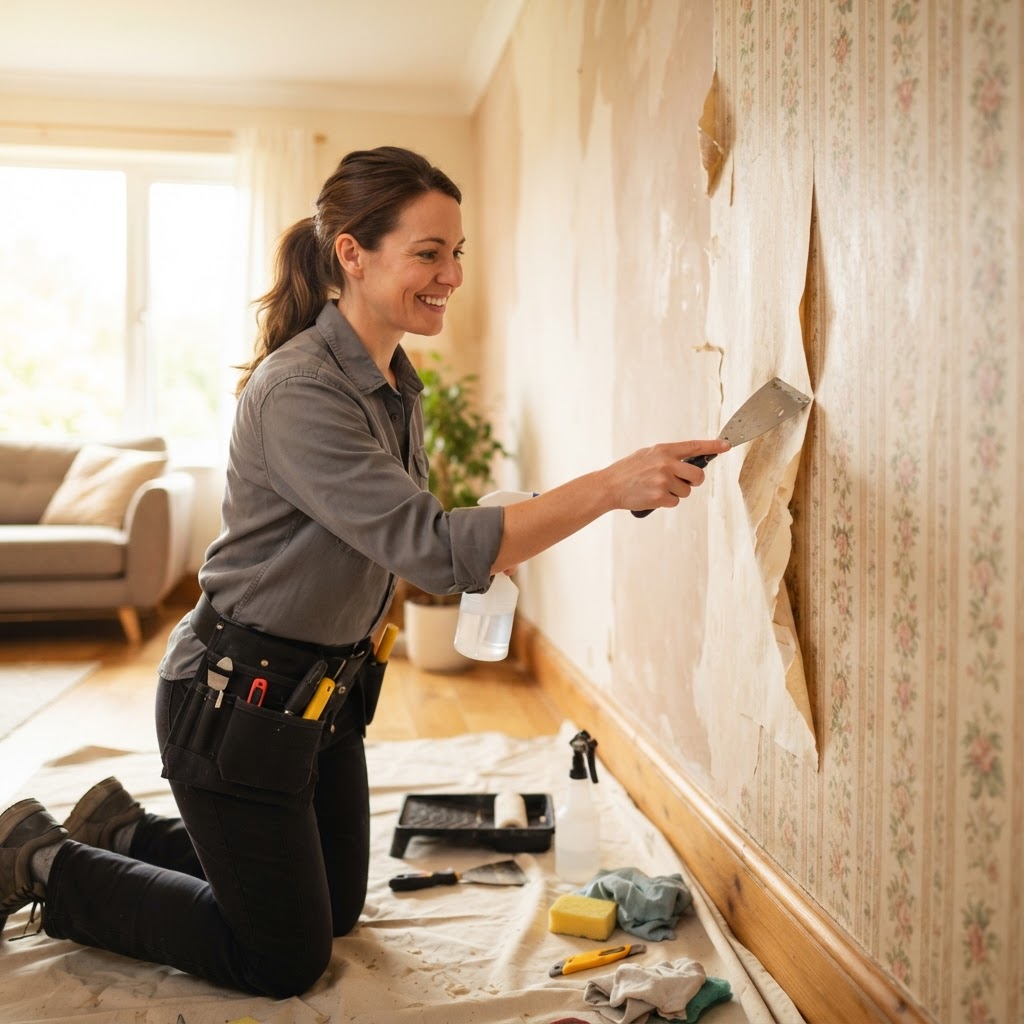
Few home improvement projects inspire as much dread as peeling back an edge of vintage wallpaper, only to watch it shred into a dozen frustrating little postage stamps. Whether you inherited a 1980s floral border or an entire living room coated in textured vinyl, stripping old wallcoverings is notorious for testing a homeowner's patience. But removing wallpaper doesn’t have to result in gouged drywall, ruined weekends, or an overwhelming mess. With the right tools, proper chemical breakdown, and trade-tested techniques, you can strip away decades of outdated decor cleanly and prepare a flawless surface for fresh paint.
Identify Your Wallpaper Type Before Doing Anything Else
Before reaching for a scraper or dousing your walls in warm water, take a moment to diagnose exactly what you are dealing with. The material and backing determine the removal strategy, and using the wrong method can turn a two-hour job into a multi-day ordeal.
- Strippable Wallpaper: The holy grail of wallcoverings. Often found in newer homes, this paper is engineered to pull away smoothly in entire dry sheets. Grab a bottom corner with a putty knife and pull upwards at an even 45-degree angle. If the entire sheet lifts away without shredding, congratulations—you will be finished in time for lunch.
- Peelable (Two-Layer) Wallpaper: Common in vinyl-coated collections. The top decorative layer peels off dry, leaving behind a fuzzy, porous paper backing securely bonded to the wall. Do not fight the backing while peeling the face; simply pull off the vinyl skin room-wide first, then treat the backing with moisture and adhesive remover in phase two.
- Traditional Paper Wallpaper: Standard cellulose paper without a plastic or vinyl coating. Water and stripping solutions penetrate this paper quickly, making it relatively straightforward to soften with moisture and scrape away.
- Vinyl and Foil Wallpaper: Modern bathrooms and kitchens often feature non-porous vinyl, metallic foil, or washable coatings. Because moisture cannot penetrate the surface, applying water directly accomplishes nothing. You must score the surface mechanically before liquid can reach the paste beneath.
Pro Test: Use a utility knife to slit an inconspicuous 4-inch square behind a door. Pry up a corner. If the face separates cleanly leaving paper behind, it is peelable. If it resists entirely, you are dealing with standard paper or vinyl requiring scoring and soaking.
The Essential Wallpaper Removal Toolkit
Professional painters do not rely on brute force; they rely on chemistry and the right blade geometry. Gathering your gear upfront prevents mid-project runs to the hardware store while your stripping solution dries out on the walls.
- Wallpaper Scoring Tool (Paper Tiger): Features small rotating cutting wheels that perforate non-porous outer layers without puncturing the fragile gypsum core of your drywall.
- Flexible Putty Knife or 4-to-6-Inch Taping Knife: Avoid stiff, sharp-cornered scrapers. A flexible blade with rounded corners glides across wet paper without gouging the wallboard.
- Garden Pump Sprayer: A hand-pump pressure sprayer covers square footage five times faster than a spray bottle and delivers an even, saturated mist with far less hand fatigue.
- Wallpaper Stripping Solution: An enzymatic wallpaper stripper (like DIF) chemically dissolves wheat paste, starch, and methylcellulose adhesives. Alternatively, a 50/50 mix of hot water and standard white vinegar works well for mild adhesives.
- Heavy-Duty Canvas Drop Cloths: Wet, sticky wallpaper scraps stick tenaciously to baseboards and hardwood floors. Avoid thin plastic, which becomes dangerously slick when wet; canvas absorbs overspray and catches falling gelatinous paste.
- Safety Gear: Nitrile gloves, safety goggles, and sturdy footwear. If your home was built before 1978, old wall treatments and underlying base coats may contain lead. Review the EPA guidelines on lead safety and renovation to protect your household before disturbing historic wall surfaces.
Prep the Room: Containing the Slime and Protecting Your Home
Experienced pros spend 30% of their time on site prep because wallpaper removal is inherently messy, wet, and sticky. Taking shortcuts here almost always leads to damaged electrical circuits or ruined flooring.
First, cut the power. You will be spraying substantial amounts of water across the walls. Locate your circuit breaker panel and switch off the electricity to every outlet, switch, and sconce in the room. Verify they are dead with a non-contact voltage tester, then remove all switch plates and outlet covers.
Next, seal the electrical boxes. Fold blue painter's tape across the open socket faces to keep liquid from pooling inside electrical junctions. Lay heavy canvas drop cloths tightly along the baseboards, taping the edges to the trim with low-tack masking tape. Keep a contractor garbage bag within arm's reach at all times—wallpaper paste hardens like cement once dry, so dropping sticky scraps directly into the bag saves hours of post-job scraping from floorboards.
If you find underlying drywall damage, water intrusion, or recurring mold during your prep phase, check out our essential home maintenance guide to address root building envelope problems before applying any cosmetic updates.
Step-by-Step: The Professional Wallpaper Stripping Process
Follow this systematic four-step method to strip even decades-old stubborn wallpaper smoothly and efficiently.
Step 1: Gentle Scoring
If your wallpaper has a vinyl or water-resistant face, roll your scoring tool across the surface in overlapping circular patterns. Apply light, even pressure. The goal is to prick microscopic perforations into the outer skin, not to carve grooves into the drywall paper underneath. If you feel the wheel cutting deep into the plaster or gypsum, lighten your touch immediately.
Step 2: Apply the Solution Generously
Fill your garden pump sprayer with very hot water mixed with an enzymatic wallpaper stripper or vinegar. Work in manageable 4-foot sections. Spray the wall thoroughly from bottom to top—this prevents downward runs from creating uneven dry channels. Let the solution dwell for 12 to 15 minutes. The chemicals need time to rehydrate and break down the dried adhesive matrix. If the wall begins drying out, mist it again; the paper must stay visibly damp.
Step 3: Lift and Scrape at a Low Angle
Slide the edge of your 6-inch taping knife beneath a saturated seam at a shallow 15-to-20-degree angle. Push forward with steady, continuous pressure. When properly saturated, the paper should lift away in long ribbons. If the paper tears into tiny fragments or resists blade pressure, pause immediately. Do not force it—apply more soaking solution, wait another 10 minutes, and let chemistry do the heavy lifting.
Step 4: Mechanical Steaming (For Stubborn Adhesive)
For walls coated with heavy paste or multiple layers of wallpaper, a commercial wallpaper steamer is your best friend. Hold the steam plate flush against a scored section for 15 to 20 seconds. The high-temperature vapor instantly liquefies ancient starch glues. Follow immediately behind the steam plate with your scraper blade while the paste remains hot and pliable.
Chemical Strippers vs. Wallpaper Steamers: Which Is Better?
Homeowners often wonder whether renting an electric steamer is worth the trip, or if a liquid stripper bottle from the hardware store will suffice. Here is how they stack up in real-world conditions:
- Chemical / Enzymatic Sprays: Best for single-layer applications, modern paste, and peelable wallpaper backings. Enzymatic strippers are non-toxic, odorless, and highly effective on standard cellulose wallcoverings. However, they struggle to penetrate multiple wallpaper layers and can oversaturate drywall if left sitting too long.
- Wallpaper Steamers: The gold standard for multi-layered paper, painted-over wallpaper, and heavy embossed vinyl. The intense thermal energy melts old paste without chemicals. The trade-offs: steamers produce significant indoor humidity, require frequent water refills, carry a mild burn risk from dripping condensate, and can soften the drywall's native paper face if held in one spot for too long.
For a single modest bedroom with standard paper, enzymatic liquid strippers in a pump sprayer are faster and easier. For a historic home featuring three layers of wallpaper glued over original plaster, rent a commercial steamer.
Removing the Invisible Enemy: Residual Wallpaper Paste
The number one mistake DIYers make is painting immediately after the paper is gone. Wallpaper paper may be off the wall, but a clear, tacky layer of adhesive almost certainly remains. If you roll latex paint over dried wallpaper paste, the water in the paint re-activates the glue, resulting in spiderweb cracking, blistering, flaking, and paint failure within weeks.
To strip remaining paste:
- Mix hot water with a squirt of grease-cutting liquid dish soap and a splash of baking soda in a bucket.
- Use an abrasive non-scratch nylon scrubbing pad to wash down the wall section by section, scrubbing in circular motions until the wall transitions from slimy to squeaky clean.
- Wipe the wall with a second bucket containing clean, cool water and a micro-fiber sponge to rinse away soap residue.
- Conduct the "Fingernail Test": once the wall is dry, scratch the surface firmly with your thumbnail. If clear or milky flakes gather beneath your nail, residual adhesive remains and needs another round of washing.
Repairing and Prepping Walls for Fresh Paint
Even with careful scraping, older drywall inevitably suffers a few surface abrasions, tears, or gouges. Before opening a paint can, your substrate needs proper cosmetic and structural prep.
- Seal Torn Drywall Paper First: If scraping pulled away the gray drywall face paper to expose the brown kraft paper beneath, do not apply spackle directly over it. The water in standard joint compound causes raw drywall paper to bubble. Seal torn spots first using an oil-based primer or a specialized stain-blocking sealer like Zinsser Gardz.
- Patch Imperfections: Once your primer is cured, skim-coat gouges and uneven patches with lightweight joint compound using a 10-inch taping blade. Allow it to dry thoroughly, then sand smooth with a fine 120-to-150-grit sanding sponge.
- Wipe Down Dust: Vacuum the room and wipe every wall with a damp cloth or tack cloth to pull off sanding dust.
- Apply a Full Primer Coat: Roll a high-grade interior drywall primer across the entire room. This evens out surface porosity between your bare patches and untouched areas, ensuring uniform sheen and deep color adhesion when you apply your topcoats.
If you discover that your walls are badly damaged or you are uncomfortable skim-coating large surface areas yourself, reviewing how to hire a service professional will help you evaluate, vet, and contract experienced local painters with confidence.
Frequently Asked Questions
Q: What is the best homemade wallpaper removal solution?
A: A 50/50 blend of very hot tap water and white distilled vinegar is the most effective homemade solution. Vinegar’s mild acetic acid cuts through traditional organic paste while breaking surface tension. For extra cling on vertical walls, add a tablespoon of liquid fabric softener or dish soap per gallon. However, for commercial adhesives or vinyl-coated backing, commercial enzyme-based strippers remain noticeably superior.
Q: Can I just paint over old wallpaper instead of removing it?
A: While technically possible, painting over wallpaper is rarely recommended by reputable contractors. Moisture in latex paint can dissolve underlying wallpaper adhesive, causing bubbling, peeling edges, and visible seams. Additionally, textured wallpaper patterns telegraph straight through paint coats. The only scenario where painting over wallpaper is acceptable is when wallcoverings are anchored to delicate historic plaster where removal would destroy the wall structure entirely—and even then, an oil-based bonding primer is mandatory.
Q: How do I remove wallpaper without damaging the drywall behind it?
A: The key is patience, shallow blade angles, and moisture control. Never use a rigid, sharp scraper with pointed corners; switch to a flexible 6-inch joint knife with slightly rounded corners. Always let your stripping solution dwell for at least 15 minutes so the glue softens completely—if you are straining your arm to push the blade, the paste is not wet enough. Avoid over-soaking raw drywall cores, and score only deep enough to puncture the decorative face.
Q: Why does my wall feel sticky even after the paper came off easily?
A: That sticky film is residual wallpaper paste. Even when paper separates cleanly, up to 90% of the dried adhesive stays bonded to the drywall. You must scrub the wall with warm soapy water and a nylon pad until the surface feels completely smooth and clean to the touch. Painting over residual paste leads to paint cracking, peeling, and uneven flashing.
Key Takeaways
Removing wallpaper requires patience, methodical technique, and the discipline not to rush the soaking process. By correctly identifying your wallcovering type, scoring non-porous layers, letting solutions dissolve the adhesive, and thoroughly scrubbing away residual glue, you can restore your drywall to a smooth, paint-ready surface. However, if your home features multiple layers of stubborn paper, soaring vaulted ceilings, or fragile plaster walls that risk serious damage, don't hesitate to call in backup. Through FIND-A-PRO, you can easily connect with verified, top-rated local painting and drywall specialists who have the heavy-duty equipment and trade experience to finish the job quickly, cleanly, and correctly.